The view dropdown has been replaced by view tabs at the top of your collection. If you see only a configure menu (⋯) and no tabs, you have one view — add a second view to see the tabs appear.
What are Views?
Views are customizable ways to display your Collection. Each view has a type and its own saved configuration:- View type — Table or Gallery
- Sorting — order items by any field
- Filters — show only items matching specific criteria
- Grouping — organize items into categories
- Field visibility — choose which fields (columns in Table, properties in Gallery) to display
- Field order — arrange fields in the most useful sequence
Creating and Managing Views
View Tabs
When your Collection has two or more views, view tabs appear at the top. Click any tab to switch views instantly. When only one view exists, the tabs are hidden — use the configure menu (⋯) to manage your view.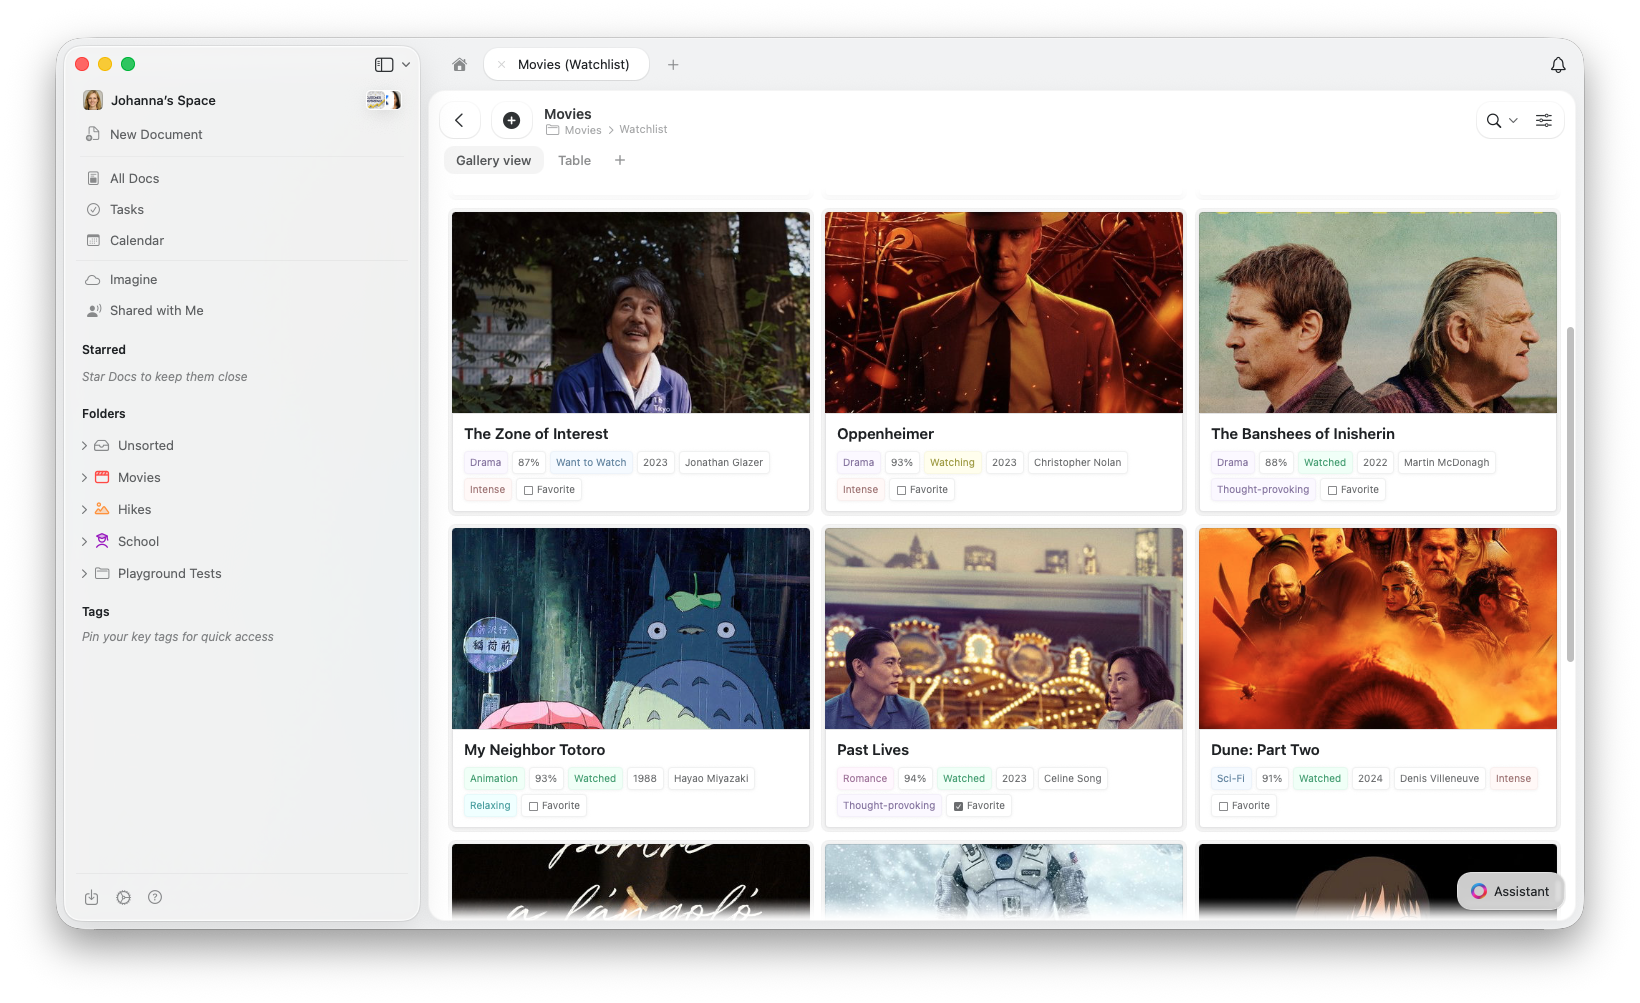
Creating a New View
Open the configure menu at the top right of your Collection (or click the + button next to your view tabs)

Switching Between Views
Click the view tab for the view you want to see. Your Collection instantly updates to show that view’s configuration.Renaming a View
Open the configure menu (⋯) and select Rename View. Type a new name and confirm.Duplicating a View
Open the configure menu (⋯) and select Duplicate View. This creates a copy with the same type, sort, filter, group, and field settings — useful for creating variations.Converting a View Type
- macOS / iOS
- Web
Open the configure menu (⋯) and select Turn Into → Table or Gallery. This converts the current view in place without creating a new one — your existing filters, sorting, grouping, and field visibility are all preserved.
Deleting a View
Calculations Row
The calculations row adds a footer to your Table View that shows computed values for each column — like sum, average, or count.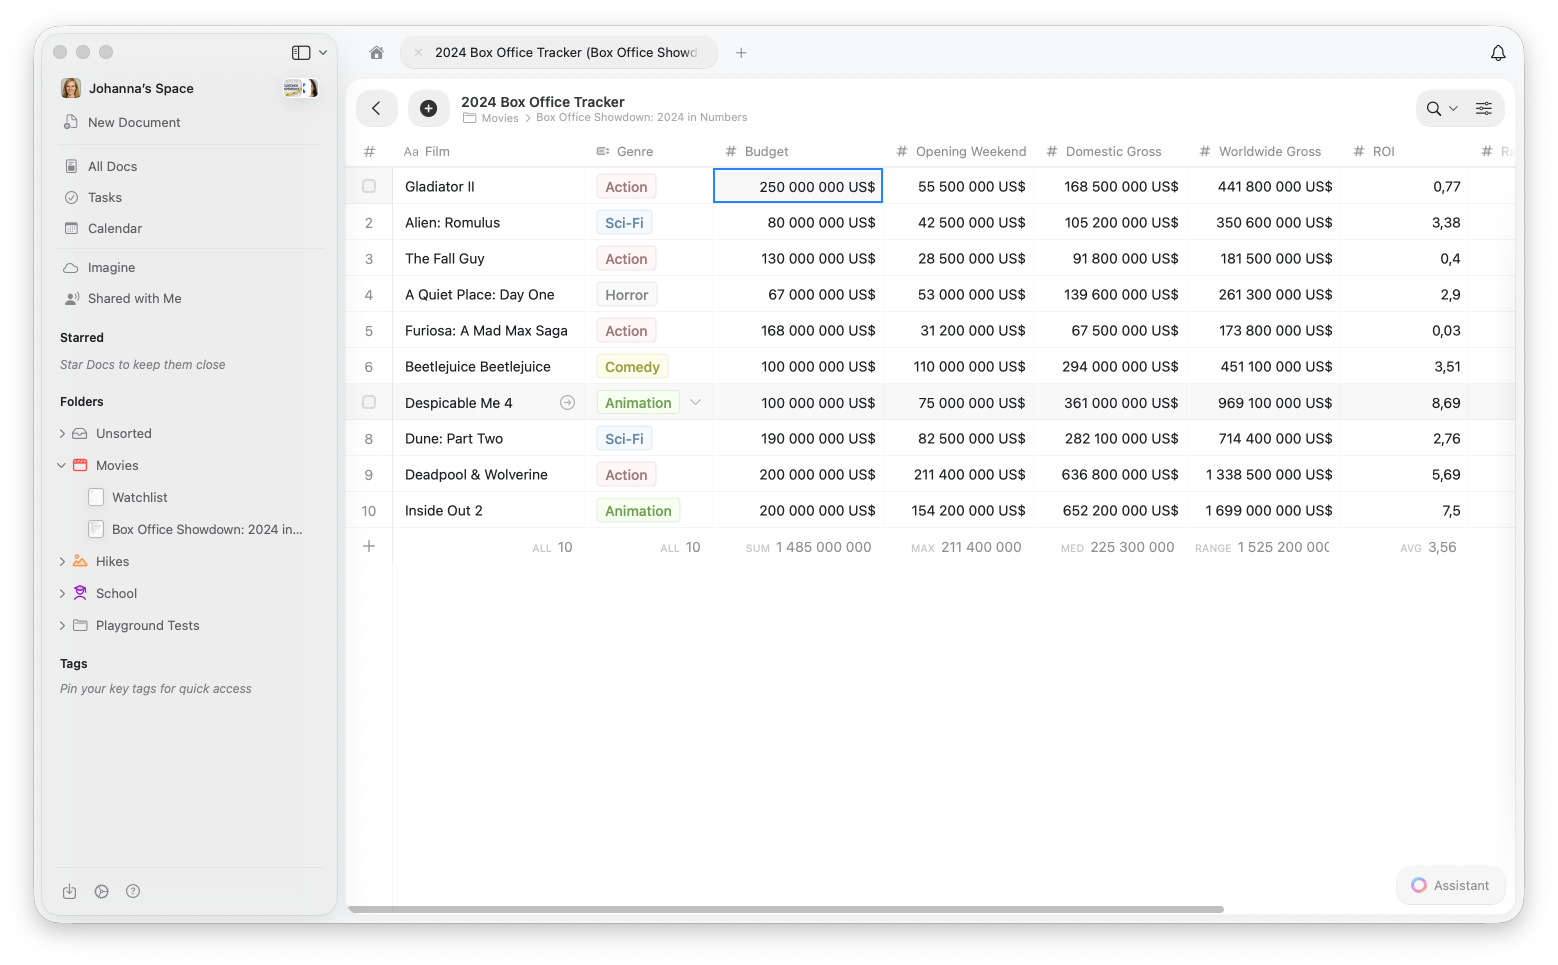
The calculations row is available in Table View only.
Sorting Items
Sorting allows you to order your Collection items by any field in ascending or descending order.How to Sort
Multiple Sort Levels
You can add multiple sort criteria to create sophisticated ordering:
Example: Sort by Status (ascending), then by Due Date (ascending) to see all “In Progress” tasks ordered by due date, followed by “To Do” tasks ordered by due date.
Removing Sorts
Click the X next to any sort criteria to remove it. You can also click Clear All to remove all sorting and return to the default order.Filtering Items
Filters allow you to show only items that match specific conditions. This is perfect for focusing on relevant data.How to Filter
The available conditions (contains, equals, before/after, is empty, etc.) depend on the field type. You’ll see the relevant options when you select a field.
Multiple Filters
You can combine multiple filters to narrow your results:
Example: Filter for Status = “In Progress” AND Priority = “High” to see only high-priority items currently being worked on.
When filtering a Select field, you can choose multiple values — items matching any of the selected values will appear. This works like OR within one field. However, filters across different fields always use AND logic.
Removing Filters
Click the X next to any filter to remove it. Click Clear All to remove all filters and show all items.Grouping Items
Grouping organizes your items into categories based on a field’s values. This creates a clear visual structure that makes it easy to see items by category.How to Group
Your Collection will reorganize into collapsible sections, one for each unique value in that field.Best Fields for Grouping
- Status - Group tasks by “To Do”, “In Progress”, “Complete”
- Priority - Organize items by “High”, “Medium”, “Low”
- Category - Group projects by type or department
- Date - Group items by month or quarter
- Single Select - Any select field works great for grouping
- Assignee - Group tasks by who’s responsible
Limitations
- Up to 20 custom fields plus the Title field (21 total) per Collection
- Filters across different fields use AND logic (all conditions must be met)
- Within a Select field filter, multiple values use OR logic (any match shown)
Related Articles
Collections
Learn about Craft Collections and field types
Gallery View
Display your Collection as visual cards with image previews
Reordering Fields and Columns
Customize field and column order
Using Collections on iOS
Touch-optimized Collections on iPhone and iPad